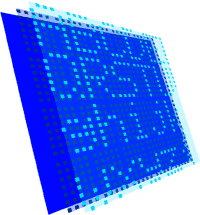
| 5x7 font glyphs |
| Brief summary of tools and techniques used | |
| to create the 5x7 font glyph image files for | |
| the photo gallery's virtual LCD panel | |
| Tools: | Photoshop, Gimp, Imagemagick, PBM tools, awk/sed/tr |
The virtual LCD panel is essentially a JavaScript-based text message display.
However the individual characters are displayed using images.
The code is described in the
photo gallery engine section of the
portfolio 2.
This page will instead summarize how the image files for the 5x7 font are created.
5x7 fonts are so named for their simple structure: a rectangular array of 5 by 7
dots per character. Such fonts are widely used in liquid crystal displays
such as those found in pagers and cell phones.
 Each of the letters, numbers and symbols is represented with an image
which is in this case 11 pixels wide by 15 pixels high. The complete
set was originally created as a layer in Photoshop, laid out in a
rectangular grid which is a multiple of 11x15. In many actual LCD panels it is also possible to see
the dot elements even when they are in the off state; in the
virtual panel this is represented by a faint darker layer below the
character layer. In this lower layer all 35 of the dot elements are
present for each cell or character in the grid; in the character layer
only those dots making up each character are present. Combining these
two layers with a third, lower solid-colour layer - representing the LCD background
or backlight - completes the set typically required to make the 5x7
font image files in a particular colour combination.
Using layers in Photoshop or Gimp makes it very easy to create new colour combinations.
To create the individual image files for each character the three layers are first combined or flattened and then saved as a GIF file. The GIF file is then manipulated with a number of shell scripts which use mogrify from Imagemagick as well as sed, awk and tr. mogrify is used to chop up the rectangular grid into 11x15 pixel chunks which are then saved as an animated GIF which is 11x15 pixels. mogrify is then called again, this time via an awk script to extract each frame - each character - from the file and rename the files with a filename that reflects the ASCII-value of the character represented as well as a code to identify the colour combination. Finally giftopnm is called to make the background of each character transparent. In some ways this step is optional but its value lies in the fact that this makes it easy to use different background colours with the same foreground colour files.
This brings us to the final three images we need. One image is the background tile; it is used as the background for the HTML TABLE which defines the panel display area. The two other images used are the cursors: a blinking cursor and a spinning cursor. All three images are created with Gimp. Of the two animated images, the blinking cursor is simply an on/off cycle of all 5x7 LCD dots while the spinning cursor is a cycle through the following characters: /, -, \ and |.